Christmas is almost here! It's my favorite holiday because of all the singing. This is one of my favorite song arrangements. You should listen to it while making today's recipe. It's a family recipe and one my Mama made a holiday tradition a long, long time ago. It's easy and probably the best homemade dinner roll recipe ever. After getting sick on the dough I can still go ahead and eat half of the baked batch myself.
The recipe comes from my Mama's grandma, or my great grandma Callow. She never used a recipe and, while instructing my Mama how to make them, said things like "a scoop of butter about the size of an egg" and "a coffee cup full of sugar." I make these every Christmas, Thanksgiving, and Easter. Try 'em out. You won't be disappointed :)
Callow Rolls
Courtesy of Mama, a.k.a. Shelley. Makes around 24.
1 package yeast (NOT "rapid rise")
1 TBS granulated sugar
1/4 cup hot tap water
small bowl
1 cup milk
4 TBS vegetable shortening
2 tsp salt
small sauce pan
1 cup cold water
2 eggs
4-5 cups unbleached, all-purpose flour
large bowl
extra flour
biscuit cutter
9x13 inch glass or ceramic baking dish
3/4 cup salted butter
1. In small bowl add yeast, 1 TBS sugar, and hot water.
2. Stir yeast and let sit until foamy.
3. In small sauce pan on the stove top, heat milk until hot but NOT boiling.
4. Remove from heat.
5. Add shortening to the sauce pan in chunks or pieces, not all in one giant blob.
6. Stir in 4 TBS sugar and salt and stir until all ingredients are dissolved.
7. Add cold water to sauce pan and stir.
8. Pour pan contents into large mixing bowl.
9. Add the yeast mixture to the large mixing bowl.
10. Add 2-3 cups flour or enough to beat easily (not splashy but not stiff).
11. Add eggs and beat thoroughly.
12. Continue adding flour, around 2 more cups, to make a stiff spoon batter. That means you want your batter to stick to your spoon but not be a lump of dough yet.
13. Scrape down the bowl and cover with a warm, damp cloth.
14. Let batter rise in a warm place with no drafts. It can take a hour or so.
15. When batter has doubled in size, stir down and let rise again.
16. Cut up your butter and place in baking dish.
17. Microwave or heat in the oven until melted.
18. On a smooth, well floured counter top or cutting board, turn out your batter.
19. Start incorporating flour and kneading into a soft dough.
20. Pat out dough to be about 1/2 inch think.
21. Cut into individual rolls with biscuit cutter.
22. Roll each dough piece in the butter and arrange in dish. Six across and four down usually works for me.
23. Turn on oven to 375 degrees ad let rolls rise in the dish for a bit.
24. Bake for 25 minutes or until th middle rolls just start to brown.
25. Serve hot, with more butter, jam, or as a sandwich the next day with left overs.
26. This recipe is easily doubled. Enjoy!
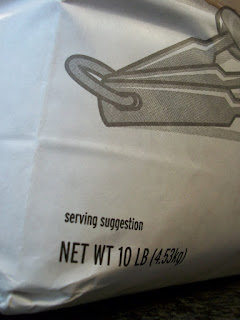
I also have a new addition to my kitchen - ta DA!
No, it's not mine, but my favorite new friend is lending it to me while he goes to Costa Rica. If he ever comes back, maybe I'll return it ;)
Wednesday, December 22, 2010
Thursday, December 9, 2010
So Much Baking, So Little Blogging Time
I have a growing backlog of baking experiences to blog about. I go out of my way to make room for baking but not (gulp) blogging. In case you didn't know, it's really time consuming. Sometimes I stay up 'till midnight to take things out of the oven. Sometimes I wake up before 6, get ready for work, run out of buttermilk, run to the store, finishing baking, and arrive late to meetings. This week I tried 4 new recipes in 6 days. This is how it went:
Saturday - Didn't go to bed until 1am due to Annah's arrival and Fab Four holiday visit. Woke up 7 hours later. Talked for the next 4 hours straight. Realized we hadn't eaten anything and were starving. Ate Chocolate Chip Scones at noon. New recipe. Moderate success. They looked pretty much perfect before going in the oven.
Sunday - Woke up at 9 am after going to bed at 2am. Talked for a few hours and then made biscuits with brunch. New recipe. No picture because they were flat and unattractive.
Monday - Didn't start making cookies before Caitlin arrived for dinner with brownies in hand. If you're ever in a pinch and need some brownies stat, I recommend those at your local Safeway bakery. They are pretty incredible. I think the secret ingredient might be marshmallow. Or a whole lot of corn syrup. Delicious still today when I ate the last one. No picture.
Tuesday - Was going to make muffins for a Wednesday morning meeting but got home late and decided that making fresh scones in the morning was a better idea.
Wednesday - See reference to waking up before sunrise above. Blueberry scones. New recipe. Success.
Wednesday part 2 - Naomi came over with wine. I promised dessert. I decided to make an apple pie from scratch. It took 4 hours. Naomi didn't get her pie until today. I will blog about this more later because it's 11:29pm. The pie was awesome :)
How do you like the new blog look? Festive and season appropriate, no? I think a bit of sparkle may be a requirement from now on. Goodnight!
Wednesday, December 1, 2010
I Finally Found It!
I finally found an amazing, bake yourself, chocolate-CHOColate-CHOCOLATE cookie recipe that keeps a lovely shape and is soft and chewy. Yesssssssssssssss! They are a bit time consuming and labor intensive but it's worth it. Trust me. These cookies are ridiculous :)
ChocChocChocolate Cookies
Adapted from America's Test Kitchen
2 cups flour
1/2 cup cocoa powder
1 1/2 tsp baking powder
3/4 tsp salt
4 large eggs
2 tsp vanilla extract
2 tsp instant coffee
10 TBS unsalted butter
1 1/2 cups light brown sugar
1/2 cup granulated sugar
12 oz semisweet chocolate
4 oz bittersweet chocolate
1 1/2 cups semisweet chocolate chips
double boiler pan OR sauce pan and a small, heatproof glass bowl
another small bowl
medium bowl
large bowl
standing mixer
baking sheets
parchment paper (quilon free! do you remember why?)
silicone spatula
measuring spoons
a regular spoon
1. Add and inch or two of tap water to a sauce pan. Heat until simmering.
2. Break your chocolate bars up into pieces and place in a small glass bowl.
3. Place the bowl of chocolate on the sauce pan, making sure the bottom does not touch the water.
4. Stir occasionally until all of the chocolate is melted and smooth.
5. Remove bowl from pan and let chocolate cool on counter.
6. In medium bowl whisk the flour, cocoa, baking powder and salt.
7. In your second small bowl, whisk the eggs, vanilla and coffee until all the coffee is dissolved.
8. Beat the butter and sugars together in a large bowl until light and fluffy, or about 5 minutes. Scrape down the sides of the bowl.
9. Add the egg/coffee mixture to the butter/sugar and beat until fully incorporated. Scrape down the bowl.
10. Next add the chocolate and beat. Scrape down the bowl.
11. Reduce the mixer speed to low and slowly add the flour mixture, scraping down the bowl and just until everything is combined.
12. Stir in the chocolate chips.
13. Cover bowl with a plate (to save moisture at altitude, don't waste plastic!) and place in the fridge for 30 minutes.
14. Clean up your mess.
15. Line your baking sheets with parchment paper.
16. Adjust the racks in your oven to be in the middle.
17. Turn on oven to 350.
18. Remove fully chilled bowl of chocolate ecstasy dough from the fridge.
19. Scoop larger than usual balls of dough (supposedly around 3 TBS) into your hands and roll a bit.
20. Place dough balls on the baking sheets leave extra space between each one because the cookies are going to be the size of your palm.
21. Bake for 5-6 minutes. Rotate the pans.
22. Bake for 5-6 more minutes and remove from oven when the cookies have cracked on top.
23. Let the cookies cool on the baking sheet for 10 minutes and then transfer to cooling racks.
24. INDULGE! With milk or vanilla bean icecream!
If you need more chocolate, use all semisweet chocolate bars or 2 cups of chips.
If you want a little more texture, use Kosher or sea salt.
If you want to share with your friends, wrap up in star printed gift bags!
Lessons Learned
Make desserts involving melted chocolate in the winter or in kitchens with air conditioning. I think my room temperature has negatively effected this type of recipe in the past. Don't microwave chocolate or try to melt in the saucepan itself. There's a really good chance you'll burn it and the resulting little, unattractive chunks do not look pretty or taste good.
Thursday, November 25, 2010
I'm Your Sous
Thanks to a late night, 3-hour shopping trip yesterday, I believe I am now ready for the most intense baking season of the year. I started hoarding supplies about a week ago and you should too. Why? Because EVERYTHING goes on sale between Thanksgiving and Christmas! I got butter and flour for half price, eggs for 99¢, and everything is super sized!
I also got this Bundt pan. Did you know the Bundt pan is actually trademarked, hence the capital B? And since America’s Test Kitchen told me the best one is made by Nordicware, that’s what I got. It’s currently in the oven with a pumpkin cake in it. My house smells AMAZING but I’m still crossing my fingers for easy removal...
Do you like how I use all caps, all the time? I do. If you feel like I’m yelling at you, I’m not. It’s just for added, across the internet, Jenni effect. Anyway, Lily made her first layer cake last night and her first batch of homemade frosting this morning. Red Velvet was a first for both of us.
I was her sous. I actually don’t know what the title is for the person directly under a pastry chef, but that was me. I prepped ingredients, cleaned as we went, and offered advice when Lily didn’t ask for it ;)
Happy Thanksgiving to all and long distance hugs to my loved ones. I am thankful for you today and always. I’ll be your sous any time.
I also got this Bundt pan. Did you know the Bundt pan is actually trademarked, hence the capital B? And since America’s Test Kitchen told me the best one is made by Nordicware, that’s what I got. It’s currently in the oven with a pumpkin cake in it. My house smells AMAZING but I’m still crossing my fingers for easy removal...
Do you like how I use all caps, all the time? I do. If you feel like I’m yelling at you, I’m not. It’s just for added, across the internet, Jenni effect. Anyway, Lily made her first layer cake last night and her first batch of homemade frosting this morning. Red Velvet was a first for both of us.
I was her sous. I actually don’t know what the title is for the person directly under a pastry chef, but that was me. I prepped ingredients, cleaned as we went, and offered advice when Lily didn’t ask for it ;)
Happy Thanksgiving to all and long distance hugs to my loved ones. I am thankful for you today and always. I’ll be your sous any time.
Monday, November 15, 2010
A Cupcake and Coffee to Go, Please
When ever I want to start out a day by treating myself, I head to a nearby coffee shop for a skim latte and the best looking thing in the bakery case. Usually that’s Wash Perk and an almond scone, or Whole Foods and an almond croissant, both of which are within walking distance from my house. Yes, I am spoiled rotten. And I like it.
When ever I want others to share in my sweet, weekday morning bliss, Claire makes coffee and I make Coffee Cakes. Today they sustained 10 VOC staff and volunteers for over 6 hours while stuffing and preparing year-end reports. Thank goodness for baked goods; we almost died of stiff necked monotony. I find that baked goods for breakfast are the best excuse for starting your day with dessert ;)
Coffee Cakes
Adapted from Martha Stewart’s Cupcakes, makes 24
Topping
1 ¼ cups unbleached flour
¾ cup brown sugar
2 ¼ tsp cinnamon
½ tsp salt
½ cup plus 2 TBS unsalted butter, room temperature
medium sized bowl
wire whisk
pastry blender or 2 butter knives
~
Batter
2 ¼ cups unbleached flour
½ tsp baking soda
1 tsp baking powder
½ tsp salt
½ cup plus 2 TBS unsalted butter, room temperature
1 cup sugar
3 large eggs
2 tsp pure vanilla extract
1 ¼ cup low fat sour cream
medium bowl
large bowl
wire whisk
standing mixer (a hand held will work too but be ready for an arm workout, the batter is heavy)
silicone spatula
regular spoon (the kind you eat cereal with)
~
Glaze
1 ½ cups confectioners/powdered sugar
3 TBS fat free milk
small bowl
wire whisk
silicone spatula
water glass
plastic baggie
scissors
1. Using the ingredients in the Topping section above, whisk together flour, brown sugar, cinnamon, and salt.
2. Cut in the butter using a pasty blender (seen below) in a medium bowl. If you don’t have a pastry blender you can use 2 knives to “cut” the butter into small pieces by making an “X” with your knives. I think it’s most efficient if you start with them touching and then pull them apart, using each one to leverage the other. The dry ingredients will automatically stick to the butter pieces, eventually making a crumbly, streusel topping mixture.
3. Refrigerate.
4. Line 24 muffin cups with paper liners and set aside.
5. Preheat oven to 350 degrees.
6. Using the ingredients in the Batter section above, whisk together flour, baking soda, baking powder, and salt in a medium bowl.
7. Cream butter and sugar together on medium-high sped until light and fluffy.
8. Add eggs one at a time, scraping down the bowl as needed.
9. Add vanilla.
10. Alternately add flour mixture and sour cream, just until combined. Batter will be heavy and a bit stiff.
11. Remove topping from refrigerator.
12. Scoop one small spoonful of batter into each muffin cup.
13. Sprinkle topping over batter in each muffin cup and press down, just a tad.
14. Scoop a second small spoonful of batter into each muffin cup.
15. Sprinkle more topping over batter in each muffin cup, the more the better!
16. Place pans in oven for 8 minutes.
17. Rotate pans and bake for an additional 8 minutes.
18. Remove pans from oven and place on wire racks to cool completely.
19. Using ingredients in the glaze section above, whisk sugar and milk together in small bowl until smooth.
20. For quick and easy drizzling, place baggie in glass as seen below by pushing one bottom corner all the way to the bottom and fill with glaze.
21. Remove cakes from pans and return to wire racks, pushing them closely together so that they re touching.
22. Carefully lift baggie out of glass and twist the top closed.
23. Cut a SMALL hole in the baggie.
24. Drizzle glaze over the top of each cake.
Voila, Coffee Cakes! Serve immediately or store in an airtight container. Try heating up for 10 seconds the next day and pairing with warm beverages. Happy baking!
Monday, November 8, 2010
Boston is Filled With Bakeries
I am waaaaaaaay behind on sharing about all of the incredible things I have eaten lately so we’ll start with Boston. Boston is full of Bakeries. I'm pretty darn sure I gained 5 pounds in 3 days as I ate my way through the entire South End last weekend with my bestie, Rachel. We walked, walked, walked all OVER that lovely, twisty, brick paved city but when you eat dessert at every meal, it doesn’t really make a difference! I guess I don't mind too much though becasue we all deserve to over indulge every once in a while. Especially when celebrating a birthday ;)
Let’s start with the South End Buttery. Isn’t it lovely?
This corner café emits welcoming warmth with its fresh flowers, large windows, soft lighting and friendly staff.
Before we got our fresh, healthy and local lunch, I scarfed down this awesome chocolate, chocolate, nut and-something-or other cookie. It was awesome.
Then I took home this red velvet cupcake. The cream cheese frosting was a tiny bit too tangy for me but man oh man was the whole thing quite tasty later that night.
Rachel saved the best for last so on my third and final day in the bay state, we went to Flour. We were probably there for almost 2 hours but the waiting in line (twice) and waiting for food in this ridiculously popular café didn't even phase me - I was completely overwhelmed! Hopefully Rachel was the only one to notice my indecision as I stood wide-eyed and salivating at the bakery case, trying to pick my poison. It was impossible to get a picture of the whole counter because we were packed in like sardines, but I hope this gives you an idea of the baked bounty.
Every day Flour serves EVERY baked good you could EVER want. Bread, rolls, scones, doughnuts, pastries, cookies, cupcakes, granola bars, shortbread bars, fruit tarts, mouse, cake, brownies, pie, you name it! I guarantee that any craving you ever have will be satisfied at this place. And they do it up like that EVERY day! I couldn’t believe it. Every single thing was fresh AND gorgeous. It’s everything I think a bakery should be. So once again, as we waited for our fresh and home made breakfasts, I started off with a little dessert!
What's that, you say? An amazing little, eat right away, melt in your mouth, triple chocolate mouse cake!
After breakfast I left Flour with a cheddar and chive scone, brioche au sucre, full belly, giant smile on my face, and this awesome book!
Flour is a wonderful, beautiful and delicious bakery. I know I say this a lot but I just keep finding things that are better than the last. I won't bother to tell you about the so-so trendy cupcakeries that have popped up everywhere but places like this deserve rave reviews. It was an incredible inspiration for me so do yourself a favor and visit the next time you’re in Mass. Happy eating!
Thursday, October 14, 2010
THE Best Chocolate Chip Cookie EVER
Sunday, October 10, 2010
Baking Layer Cakes
Layer cakes are hard. More than anything, well only baking wise of course, I want to be able to produce a perfectly shaped, flat toped and smoothly iced layer cake. Three layers is my favorite. I once made a carrot cake that seriously took forever but I learned a few things that day and hope to not repeat 8-hours-standing-barefoot-in-the-kitchen again. Ouchie. Unless someone is paying me because it’s five years later and I’m the best at-home cake baker in Denver ;)
The occasion was Matt and Rebecca’s wedding celebration at work. We got them a waffle iron and served this cake.
Here are some things I have learned thus far about layer cake baking:
1. Have enough pans to bake all of your layers at once. Not doing so takes twice as long and produces layers with slightly different textures.
2. Be overly generous when greasing your pans. I always thought, “A little is all I need – more cost effective and a tad bit healthier.” I was wrong and HAVE cried when large chunks of cake are still in the pan after flipping the rest out.
3. Use a measuring cup or scale when diving batter between pans for evenly sized layers.
4. Drop each pan on a hard surface (only from a few inches above) a few times after the batter is in and before you put them in the oven. This levels the batter and helps eliminate any large air pockets.
5. Take the cake out of the oven within the cook time suggested. I left the cake above in a bit too long after forgetting that it will have time to fully set while cooling afterwards. It was a good recipe but ended up being too dry.
6. Run a butter knife or small frosting spatula between the cake and pan after removing from the oven to make sure there aren’t any tiny snags on your edges.
7. Let your cakes cool completely before trying to remove them from their pans or you may encounter the problem described in tip #2.
8. Level your cake layers by cutting the tops off with a long, freshly sharpened serrated knife, or one of these handy wires I bought at Cake Crafts in Englewood.
And for many, MANY more tips on cake baking, read America’s Test Kitchen baking book for THE overall best baking tips I have found. Supplement those with high altitude adjustments found in Susan G. Purdy’s Pie in the Sky.
Maybe someday my layer cakes will look more like this!
Congratulations to Lisa and Brandon in Texas, whose wedding I just returned from this morning. Their amaretto cake above was delish!
Tips on frosting layer cakes to come and please, please let me know if anything I post ever works (or doesn't!) for you.
Sunday, September 26, 2010
An Autumn Fav for Every Altitude
Pumpkin Cookies
Courtesy of Mama, a.k.a. Shelley
For cookies:
2 cups light brown sugar
1 can plain pumpkin
1 cup vegetable oil
2 tsp vanilla
4 cups flour
2 tsp baking soda
2 tsp baking powder
1 tsp cinnamon
1 tsp nutmeg
1 tsp salt
2 large bowls
mixer (hand help or standing)
silicone spatula
short wooden spoon
baking sheets
quilon free, unbleached parchment paper (it’s biodegradable)
wire cooling racks
For glaze:
3 oz fat free cream cheese
1 tsp vanilla
1 TBS milk
1 cup confectioners/powdered sugar
medium bowl
silicone spatula
hand held mixer
1. In large bowl, cream sugar, pumpkin, oil and vanilla together on low speed until smooth (don’t be scared, it will be kinda sloppy and oily).
2. In another large bowl, whisk flour, baking soda, baking powder, cinnamon, nutmeg and salt together.
3. Add 1/3 of the dry mixture to the creamed mixture.
4. Blend with mixer until smooth.
5. Add another third of the dry mixture to the creamed mixture.
6. Blend with wooden spoon until smooth.
7. Add remaining dry mixture to the creamed mixture and blend until smooth (it's okay if its heavy and stiff).
8. Turn on over to 350.
9. Prepare baking sheets with parchment paper.
10. Drop spoonfuls of batter on to cookie sheets. Sometimes I mold it in my hands a bit to make them more rounded and smooth.
11. Bake for 10 – 12 minutes.
12. Remove sheets from oven at let set 2 minutes.
13. Move cookies to racks to cool completely.
14. In medium bowl combine cream cheese, vanilla, milk and sugar.
15. Mix on medium speed until smooth.
16. Dunk the top of each cookie into the glaze and then let dry on wire racks (some WILL drip off so make sure you make these on a surface you can easily mess and then clean up :)
Lesson Learned
If your cakes or cookies get cracks in them it means they're too dry. This time around, my cookies simply had too much flour. Lesson learned? I didn't need to up the flour amount to 4 and 1/3 cups. Oh well, they were still FALLtastic!
Labels:
cookies,
For Every Altitude,
Frosting,
lessons learned,
pumpkin,
Recipes
Friday, September 24, 2010
Melted Cake
I made a theme cake recently, my first one! It was for The Mighty Acorns 2010 awards banquet. I was pretty proud of myself after buying a special sphere shaped pan and professional cake box, and trying out icing bags and tips for the 3rd time ever. It ended up looking pretty good but I left the cake in my car on an 80 degree day for a quick meeting in Boulder, pre-banquet. What was I thinking? My grass wilted and the softball almost balded. But it still tasted pretty good.
P.S. I have my first non-friend follower, woo hoo!
Tuesday, August 31, 2010
Lots 'O Good Looks, Good Eats and Bread Revisions
Warm brownie sundaes are one of my all time favorite desserts and go to option if splurging while out. Most are okay, some are good, and this one from the Chop House was the best EVER. I made sure to share with the dinner's honoree, birthday boy Tyre.
I visited D Bar again recently for a friend's birthday. The Cake and Shake, Brulee of the week and glass of crazy bubbly wine were all delish. I heart you D Bar.
The Mighty Acorns also had their season closer on a hot, hot Sunday afternoon and celebrated with food and drink at the ridiculously amazing home of Liz and Chad. Chad's Super Chocolate Cookies were TO DIE FOR. Seriously, I have been looking for a homemade cookie recipe like this for YEARS. Maybe someday he'll share it with me?
And just this past weekend I made a solo road trip up through Wyoming, Idaho and Montana to attend the wedding of Danika and Dave, one of the sweetest couples I know. Their cake was GORGEOUS. Don't you think?
FYI to all the bread bakers - I've made changes to the "Holy Mackerel!" post so reprint or recopy if need be!
Labels:
Brownies and Bars,
chocolate,
cookies,
Denver,
Good Eats,
Good Looks
Sunday, August 15, 2010
D is for DESSERT!
I have no good reason for not visiting D Bar earlier. I knew it existed and had even seen the massive waiting line spilling out on to the sidewalk. But why didn’t I stop?! No problem. That’s over with and I can now say D Bar is currently at the top of my Denver dining list.
Why, you may ask, am I using an entire blog entry for one restaurant? Because the D in D Bar stands for DESSERT. Normally I don’t really like places that are total scenes where you wait a really long time for something you can get at several other places in town, but D Bar doesn’t feel like that at all. It’s definitely a bit of a scene but because they have a large patio, great staff, and the evening was warm, I didn’t mind waiting 30 minutes on 17th street sidewalk with white wine in hand. I also had a lovely dinner date ;)
I suggest going not only for dessert but also for dinner. The plates are small, the flavors rich and deep, and the sweets more than large enough for sharing. Our party of three ordered D Bar Dates, The Monika, Wraptastic, and Kobe Sliders. Uh. May. ZING. Seriously. The best dinner out I have had in quite some time.
Knowing it could only get better, we then successfully finished off a Rhuberry!, Cake and Shake, and some sort of Souflee that came with a tropical fruit sauce and baby beignets. It was long past dark by the time we got to dessert so I don’t have any good pictures to show you, but you can check out photos on their website here. Go try this place. I promise you won't be disappointed.
Sunday, August 1, 2010
Holey Mackerel!
Mary Mullins Original Homemade Bread
Allow 3-4 hours. Yields 2 medium sized loaves.
It worked! We didn't fail miserably!! It may even be good enough to sell because it looks pretty much perfect!!! And breathe...
My first weekend spent entirely at home in almost 2 months was graced by a vist from one of my cousin’s cousin second removed or something or other, Victoria. Somehow, after an 11 o’clock breakfast on a 90 degree day, she convinced me to attempt Mary Mullins’s famous homemade bread. We used a “reprinted by special request” recipie from the 1980 Ware’s Grove Lutheran Church Cookbook. I don’t know when it was originally printed but I’m guessing its date of conception was long before that, sometime during the early years of Alvin Leroy Mullins and Mary Elizabeth Ware’s marriage. Late 1930’s? And maybe she got it from a family member before her?
ANYways, after buying 3 new bread pans, calling several Mullins and Hewitt family members, and researching high altitude bread recipe adjustments, the baking commenced.
1/3 cup sugar
2 tsp salt
2 cups boiling water
1/3 cup vegetable oil
1 package active dry yeast (do NOT use rapid rise yeast at altitude!)
1/3 cup hot water (not boiling)
1 large beaten egg
3/4 cup cornmeal
3/4 cup dried milk
1 tsp garlic powder
About 4 and 1/2 cups bread flour (we need more gluten at altitude)
2 large bowls
2 small bowls
2 large bread pans
rubber spatulas
wooden spoon
cooking spray
fork
some real butter
1. In a large bowl whisk sugar and salt together.
2. Pour boiling water over sugar and salt mixture, then add oil. If need be, stir and scrape down sides until all sugar and salt is dissolved.
3. Let cool.
4. In small bowl combine yeast and hot water. For more direction on yeast, read the back of the packet ;)
5. In another small bowl whisk together cornmeal, dried milk, and garlic powder.
to the liquid mixture.
6. Add dried mixture to liquid mixture/large bowl.
7. Add beaten egg to large bowl.
8. Add yeast mixture to large bowl.
9. Add flour, about 1 cup at a time, smooshing out any clumps of dry ingredients.
*Wooden spoons with shorter handles are my best friends in bread making. They are strong and the best option for quickly and effectively starting your dough*
10. When not sticky but also not stiff, remove dough from bowl onto lightly floured surface. Knead until smooth, only adding tiny bits of flour as needed.
**Knead you say? How do I knead? My mom taught me to knead with my fisted knuckles and heels of my hands. This is my personal kneading style:
Press, press, press out the dough ball with the heels of my hands.
Fold in a third of the dough and roll the seam with my knuckles. Repeat, repeat.
Punch, punch, punch with my fists until the dough is uniformly shaped again.
Repeat, repeat, repeat whole process until smooth!**
11. Spray the inside of a second, clean large bowl with cooking oil.
12. Place dough into the sprayed bowl and press into bottom. Flip dough over so both sides have a bit of oil on them.
13. Tightly cover dough bowl with plastic wrap and set in a warm place with no drafts to rise.
14. When dough has doubled in size (ours took about an hour and a half) punch down and divide into 2 equally sized dough balls.
15. Roll and mold each dough ball in your hands a bit to elongate it into more of a rectangular, pan shape.
15. Spray the insides of 2 large bread pans.
16. Place a dough ball in each of the pans. Press into bottom and then flip over so both sides have a bit of oil on them.
18. Re-cover tightly with plastic wrap and let rise until dough is pushing against it (ours took about 30 minutes).
19. Turn on oven to 350 degrees.
20. Punch down dough in each pan.
21. Poke rows of holes in the dough with a fork.
22. Bake for 45 minutes, rotating pans half way through.
23. After removing from oven, turn out loaves onto cooling rack.
24. Brush tops of loaves with butter and eat warm, as toast, or with sandwiches!
It sure smelled like Grandma’s bread, and it pretty much tasted like it too. But the texture was 100% different. Was it my Omega-3 oil? Less air pressure? Extra yellow corm meal? Failure to punch down and let rise a third time? Who knows. We didn’t really care anyway, which was obvious when we were already down half a loaf only 12 hours later ;)
Subscribe to:
Posts (Atom)